|
Replacing Your Pop-Top Canvas 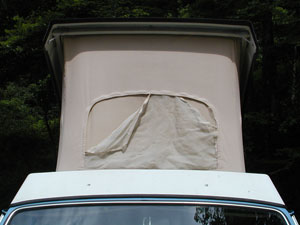 OK, the canvas in our 46 year old van was in super shape. The only gripe I had was the zippers had pulled away from the canvas and become unusable. Opening the window in the canvas is a major source of airflow in the van, especially upstairs. Repairing the canvas really required removing it, so we decided to replace it with a three-window model from Bus Depot. We'd get new canvas and more windows/airflow. OK, the canvas in our 46 year old van was in super shape. The only gripe I had was the zippers had pulled away from the canvas and become unusable. Opening the window in the canvas is a major source of airflow in the van, especially upstairs. Repairing the canvas really required removing it, so we decided to replace it with a three-window model from Bus Depot. We'd get new canvas and more windows/airflow.
My first impressions of the Bus Depot canvas are mixed. It's isn't quite as heavy as the original canvas and the zippers are very delicate (although they are self-sealing). The fit was a little too snug and one of the zippers wants to split open when you zip it closed. I don't expect to get 25 years out of it and I think next time I'll spend more than the $239. It's also a little brighter inside the van, good or bad.
The new canvas came with very good directions and I'll only paraphrase those, but I wanted to pass on some ideas that did and didn't work for me. My 1980 Westy may be different than your van, but the concept should be similar. The directions assume that you remove the fiberglass roof, but suggest the procedure can be done without removing it. Since I have a solar panel on top, I did not remove my roof, but I believe that it would have been easier to do so.
Before I started, I took a series of quick digital pics of everything in case I had questions about how it all went back together. I also removed both the upstairs mattresses and unscrewed and removed the front, folding part of the bunk.
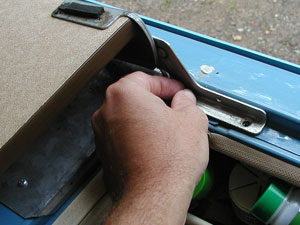
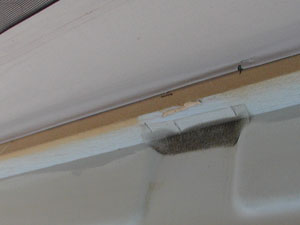
The canvas is fastened on the bottom between a metal strip and the body of the van. There are about fifty tiny screws mounting it to the van. As you remove the strips, mark the bottom of each for orientation (left, right, which way is front). Notice the edge of the canvas has a plastic bead and how it's aligned along the edge of the strip. 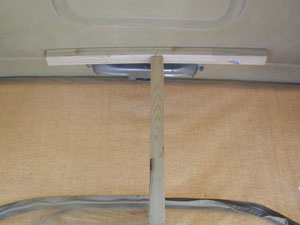 I removed the side strips and then front and back. The lifting mechanism has to be detached from the roof and wired down so it will stay out of the way. I removed the latch and used a T-shaped prop to hold the roof part way open. I removed the side strips and then front and back. The lifting mechanism has to be detached from the roof and wired down so it will stay out of the way. I removed the latch and used a T-shaped prop to hold the roof part way open.
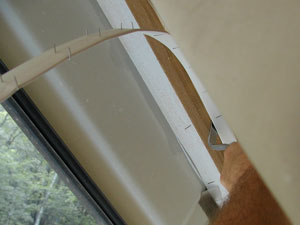
The canvas is held to the top by plastic strips stapled to a wood frame. 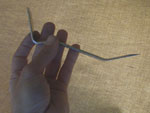 I used a brake adjustment tool to remove these, which worked very well. This leaves the canvas attached to the roof by a few staples. I used a brake adjustment tool to remove these, which worked very well. This leaves the canvas attached to the roof by a few staples.
 Before removing these, I marked the location of each to give me a rough location of the edge of the old canvas. I actually drew a chalk line along these to use as a reference point for reinstalling the new canvas. Remove the rest of the staples and the canvas is free from the van. Now the fun begins. Before removing these, I marked the location of each to give me a rough location of the edge of the old canvas. I actually drew a chalk line along these to use as a reference point for reinstalling the new canvas. Remove the rest of the staples and the canvas is free from the van. Now the fun begins.
 Fold the canvas in half along each of the edges and mark them with a permanent marker. Measure along each side of the roof and mark the center. Align the marks on the canvas with the marks on the roof. I started with the front center and worked toward the corners, then did the back and sides placing a 3/4" staple every six to eight inches. Remember, the canvas is stapled with the edge facing down and then folded over the plastic strip you'll be adding soon. I used my chalk mark to align the edge of the canvas. Next add the plastic strips, stapling them at roughly the same interval at the original, but I placed several staples at each end. Fold the canvas in half along each of the edges and mark them with a permanent marker. Measure along each side of the roof and mark the center. Align the marks on the canvas with the marks on the roof. I started with the front center and worked toward the corners, then did the back and sides placing a 3/4" staple every six to eight inches. Remember, the canvas is stapled with the edge facing down and then folded over the plastic strip you'll be adding soon. I used my chalk mark to align the edge of the canvas. Next add the plastic strips, stapling them at roughly the same interval at the original, but I placed several staples at each end.
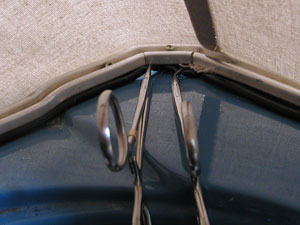 Attaching the bottom of the canvas is more interesting. The fit was so snug here that it was very frustrating. I started with the front and then did the back and the sides. I'd recommend starting with the back and getting it over with. Place the plastic bead on the edge of the canvas under the aluminum strip. Make sure it's hanging straight down and put the center screw in through the canvas. Pull the canvas toward the outside edge and put in the next screws on either side of the center to get a solid base to work from. I had to really push the metal strip backwards at the corner to realign it. Carefully cut the plastic strip at the corner to match the curve of the strip. Hemostats were very helpful in holding the beading in place while the strip was screwed down. Repeat for the other end. The sides are fairly simple comparatively. Attaching the bottom of the canvas is more interesting. The fit was so snug here that it was very frustrating. I started with the front and then did the back and the sides. I'd recommend starting with the back and getting it over with. Place the plastic bead on the edge of the canvas under the aluminum strip. Make sure it's hanging straight down and put the center screw in through the canvas. Pull the canvas toward the outside edge and put in the next screws on either side of the center to get a solid base to work from. I had to really push the metal strip backwards at the corner to realign it. Carefully cut the plastic strip at the corner to match the curve of the strip. Hemostats were very helpful in holding the beading in place while the strip was screwed down. Repeat for the other end. The sides are fairly simple comparatively.
Replace the lifting mechanism and raise the roof carefully. The project took about eight hours to complete.
|